API Protection > Class - API Protection > Module 2 - Additional Security - Bot Defense and WAF Source |
Lab 2.1 - Prepping the Lab
By default, security events are not logged, in this lab the student will create a security logging profile with Application Security, Bot Defense and DOS Protection enabled. The student will also place the waf policy in trasnparent to show the difference in behavior when client traffic that is deemed malicious is and is not blocked.
Task 1 - Add Vulnerable API
- From the web browser, navigate to API Protection >> Profile. Click Profile to modify the previously created API protection Profile (not the + Plus symbol)
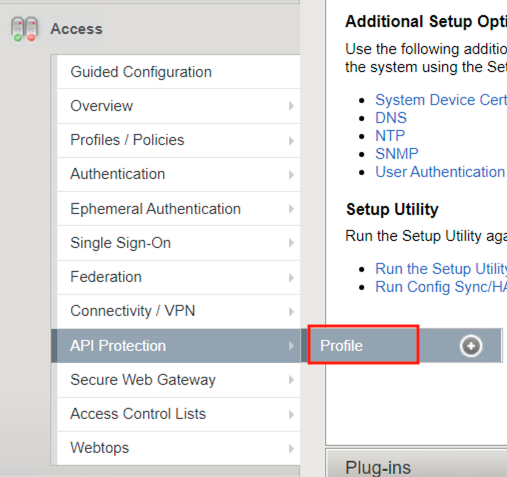
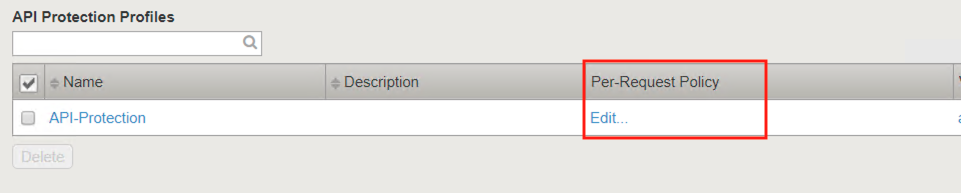
- Click API-Protection

- Click Edit Under Per-Request Policy
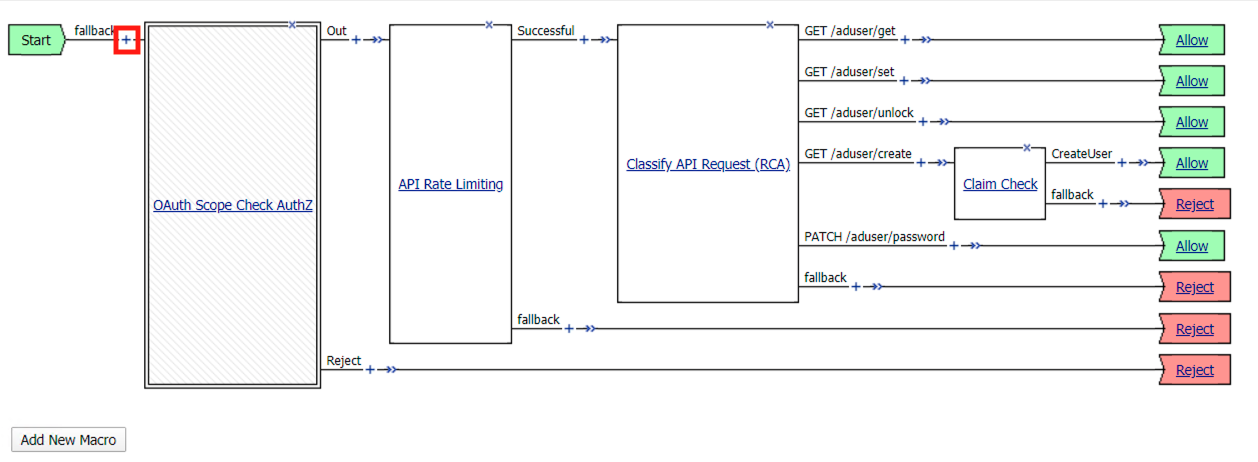
- Click the + (Plus Symbol) located between Start and OAuth Scope Check AuthZ
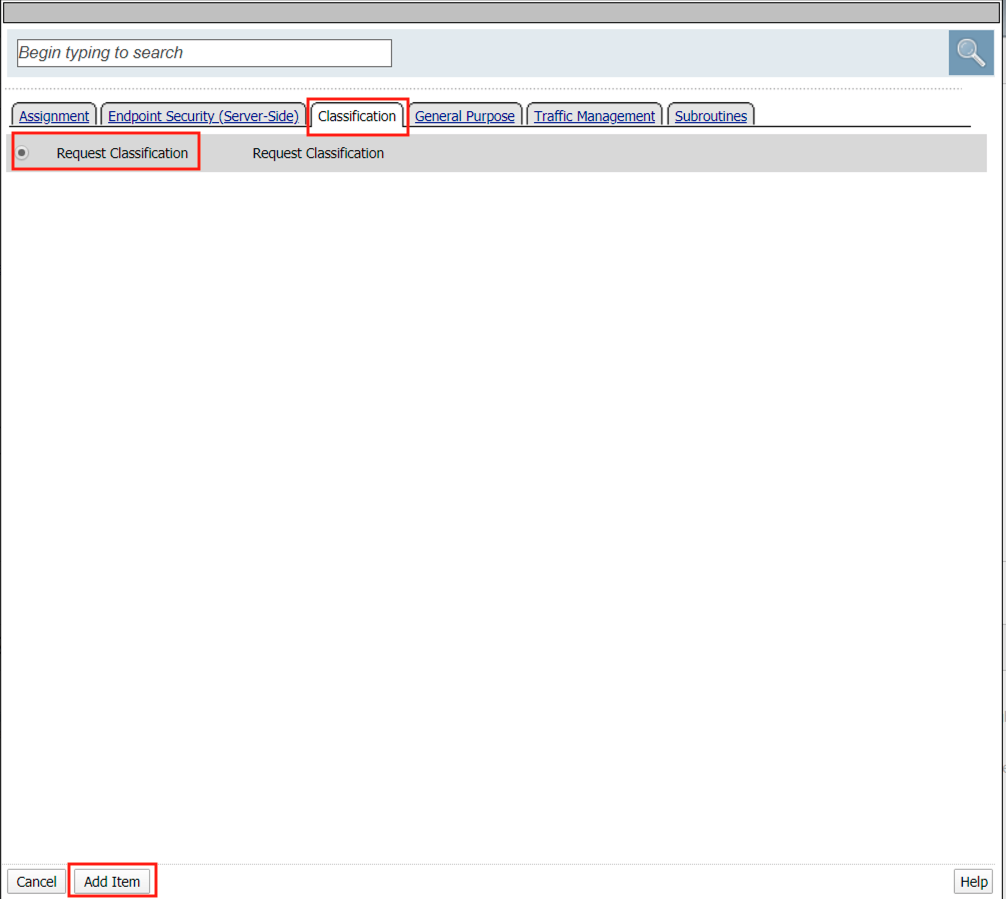
- Select the Classification tab
- Select Request Classification
- Click Add Item
- Select Branch Rules
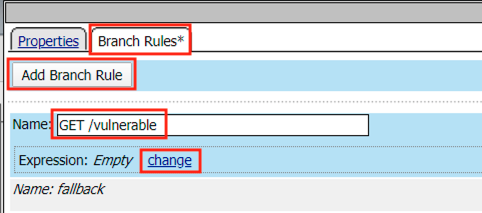
- Click Add Branch Rule
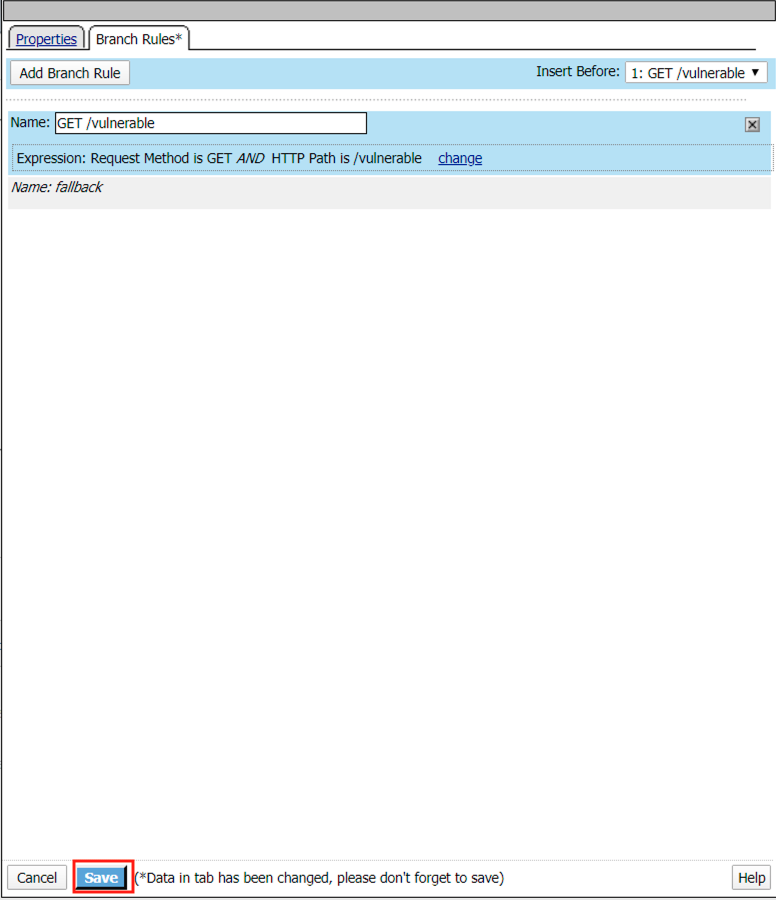
- Enter name ** GET /vulnerable**
- Click Change
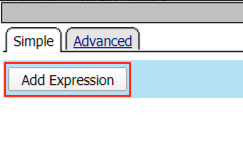
- Click Add Expression
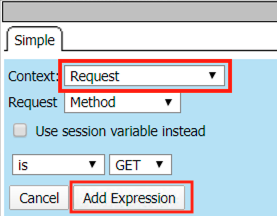
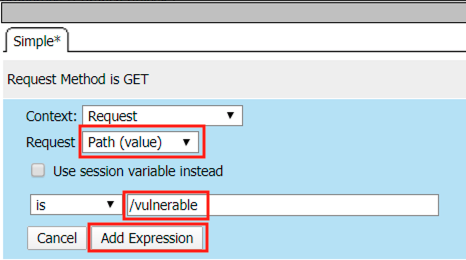
- Select Request from the Context dropdown
- Click Add Expression
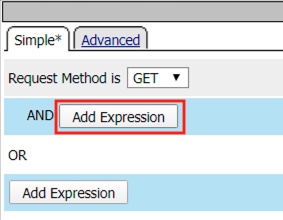
- Click Add Expression on the AND line
- Select Path (value) from the Request dropdown
- Enter /vulnerable in the empty text box
- Click Add Expression
- Click Finished
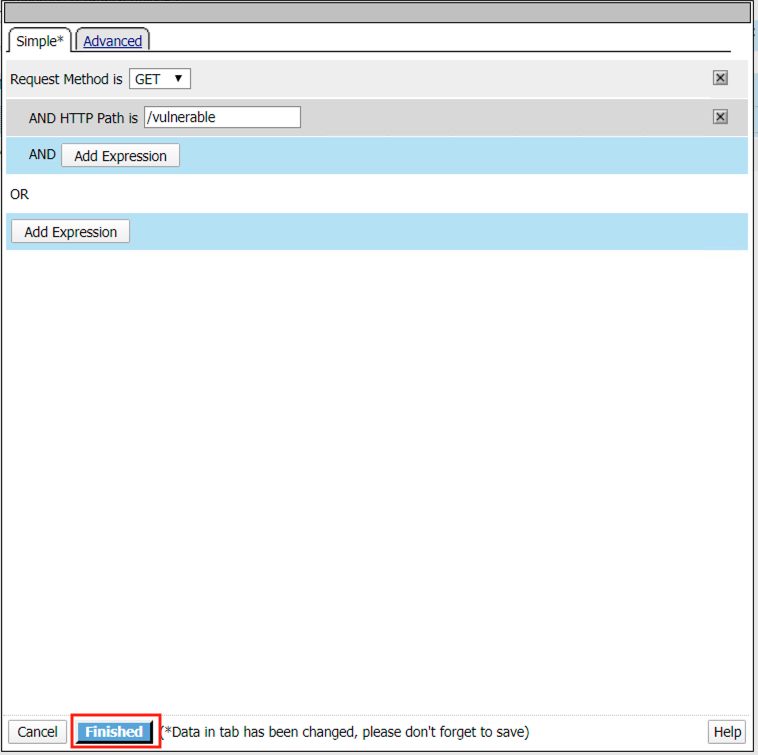
- Click Save
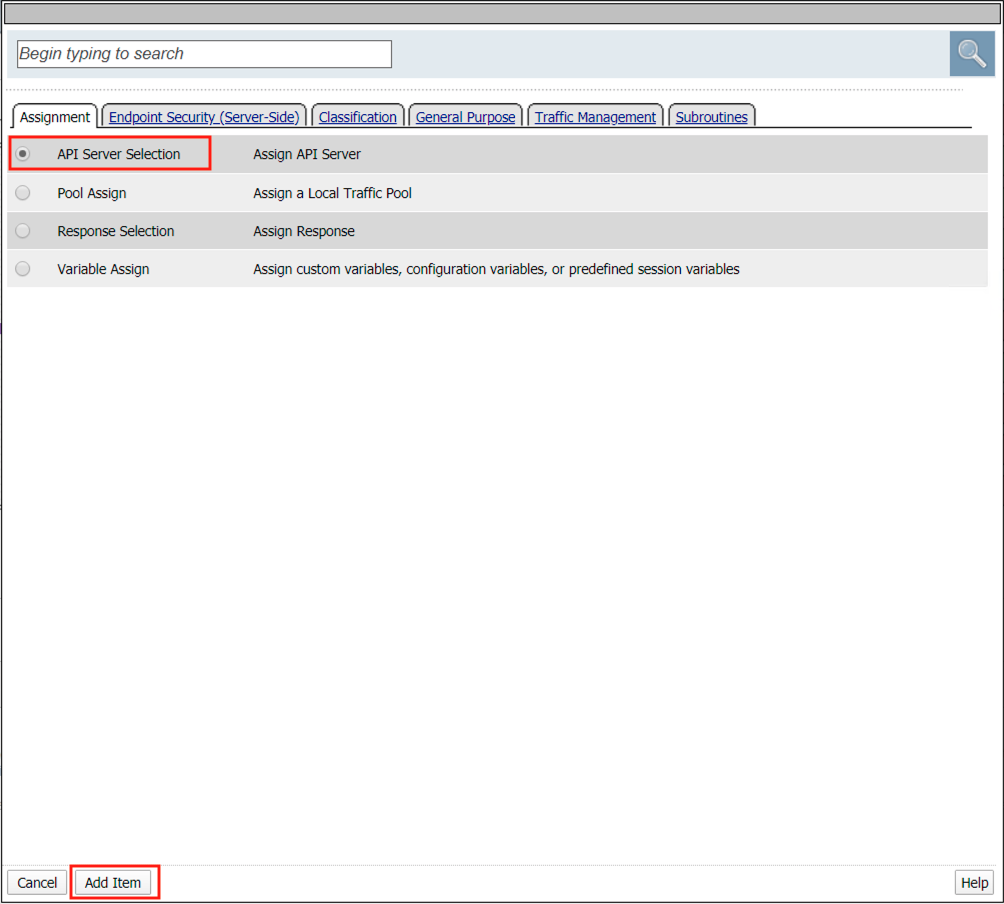
- Click the + Plus Symbol on the GET /vulnerable branch
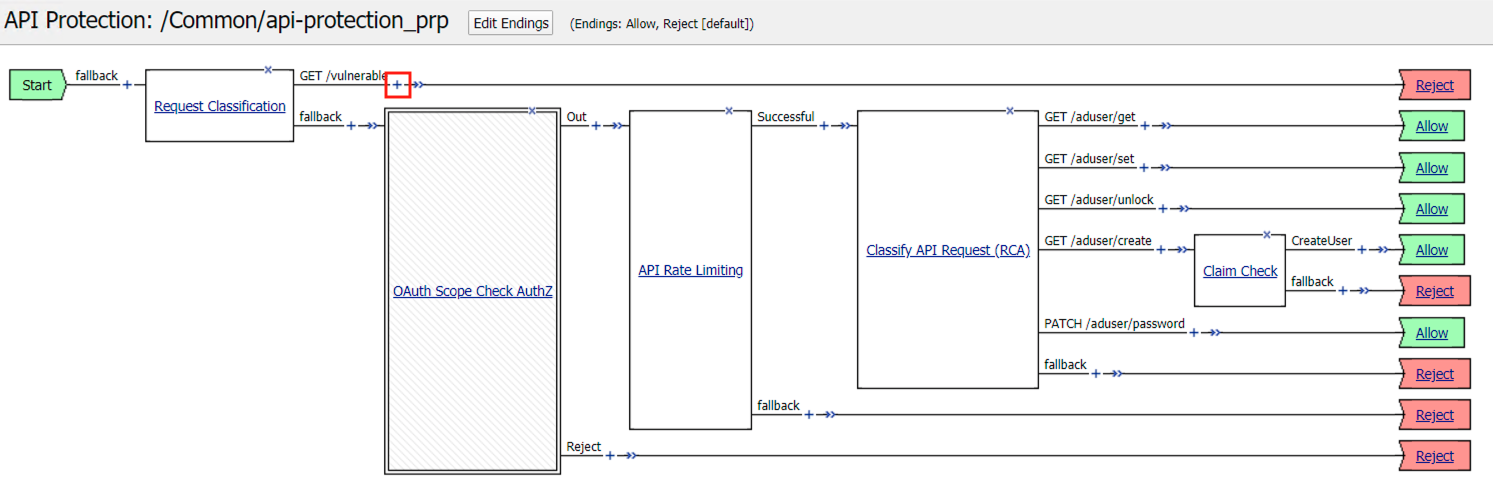
- Click API Server Selection
- Click Add Item
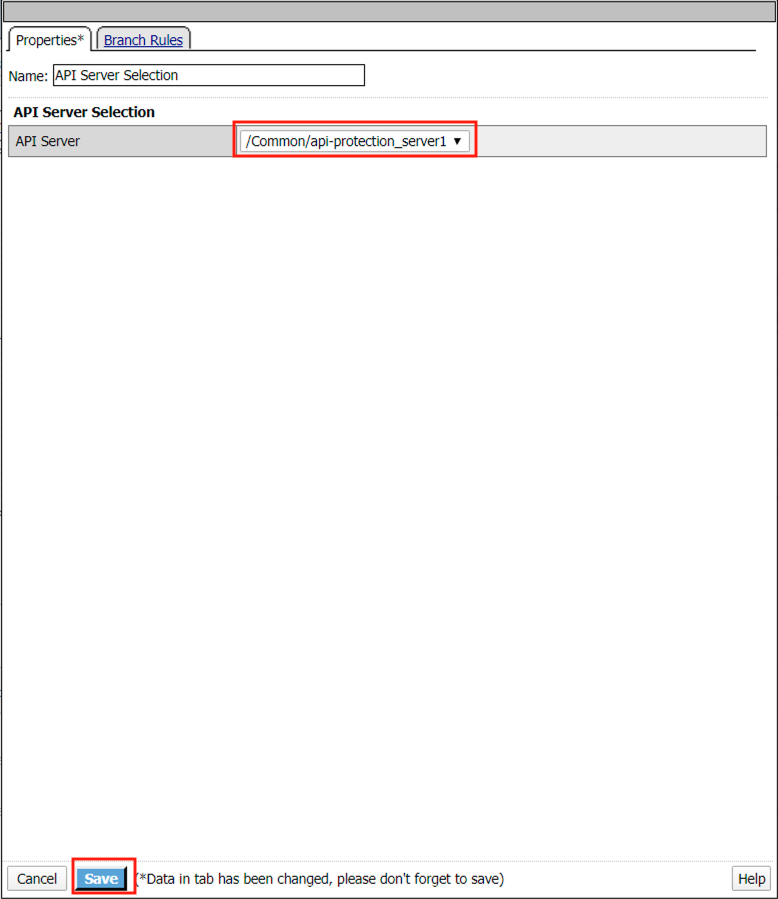
- Select api-protection_server1 from the dropdown
- Click Save
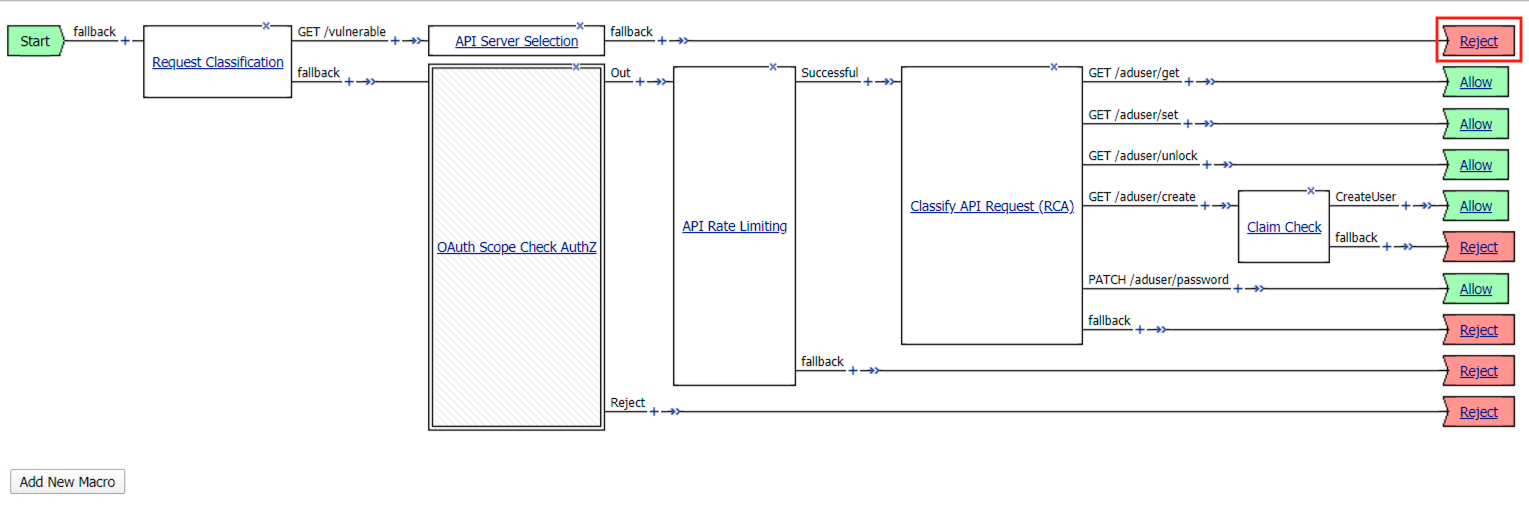
- Click the Reject terminal at the end of API Server Selection
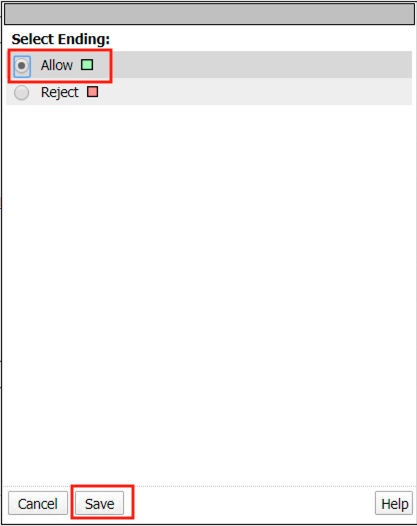
- Select Allow
- Click Save
- The completed policy should look like the below.

Task 2 - Create and assign a Security Logging Profile to the virtual
Note
Ensure you are logged into BIGIP1
- From the web browser, click on the Security -> Event Logs -> Logging Profile and click Create.
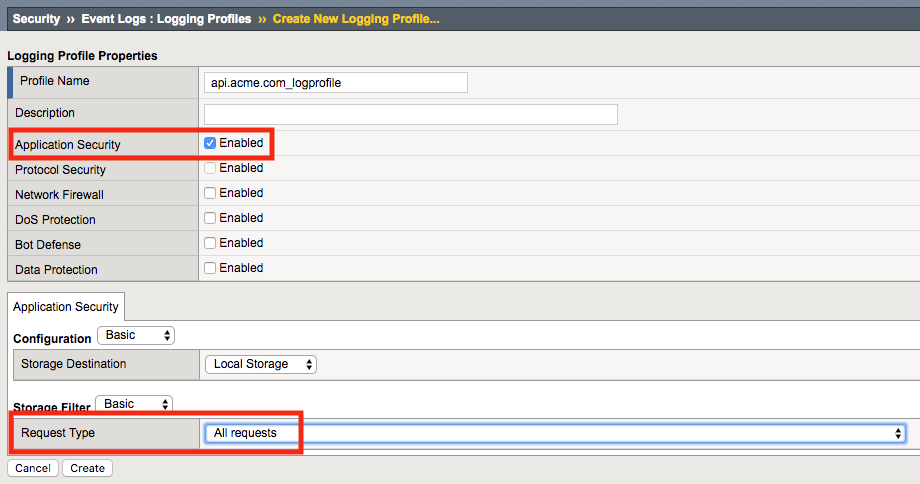
- For the Profile Name enter api.acme.com_logprofile.

- Enable Application Security a Application Security configuration menu will open up at the bottom. Change the Request Type from Illegal requests only to All requests.
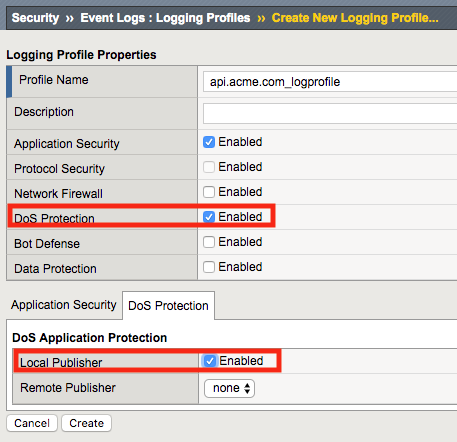
- Enable DoS Protection, a DoS Protection configuration menu will open up at the bottom. Enable Local Publisher
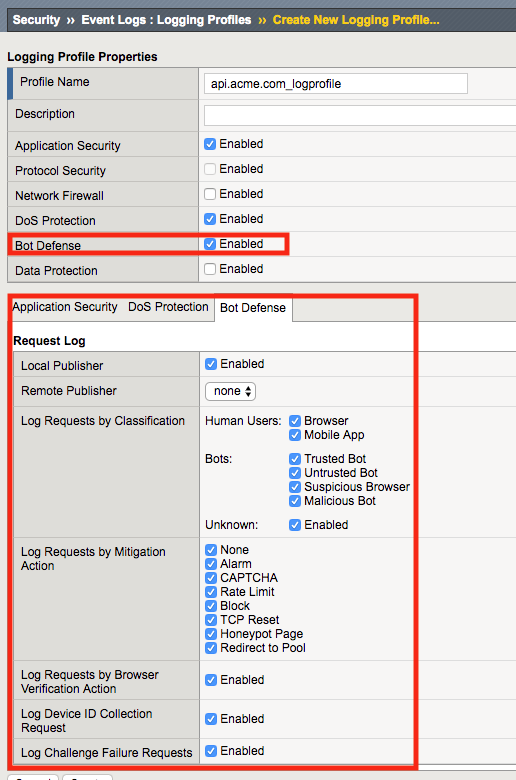
- Enable Bot Defense, a Bot Defense configuration menu will open up at the bottom. Enable Local Publisher and all other checkboxes, leave Remote Publisher set to none.
- Click Create
- Apply the bot profile to the api.acme.com virtual by navigating to Local Traffic -> Virtual Servers -> api.acme.com -> Security -> Policies and set the Selected Log Profile to api.acme.com_logprofile.
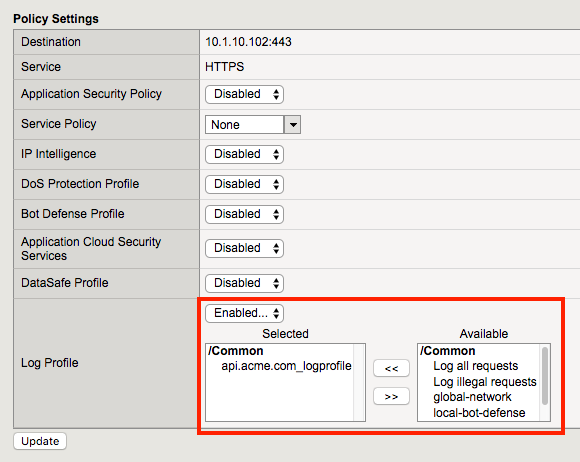
- Click Update. The virtual will now log Application Security, DoS and Bot related events under Security -> Event Logs when an appropriate security profiles have been applied to the virtual.
Task 3 - Set the WAF policy to Transparent and assign it to the virtual
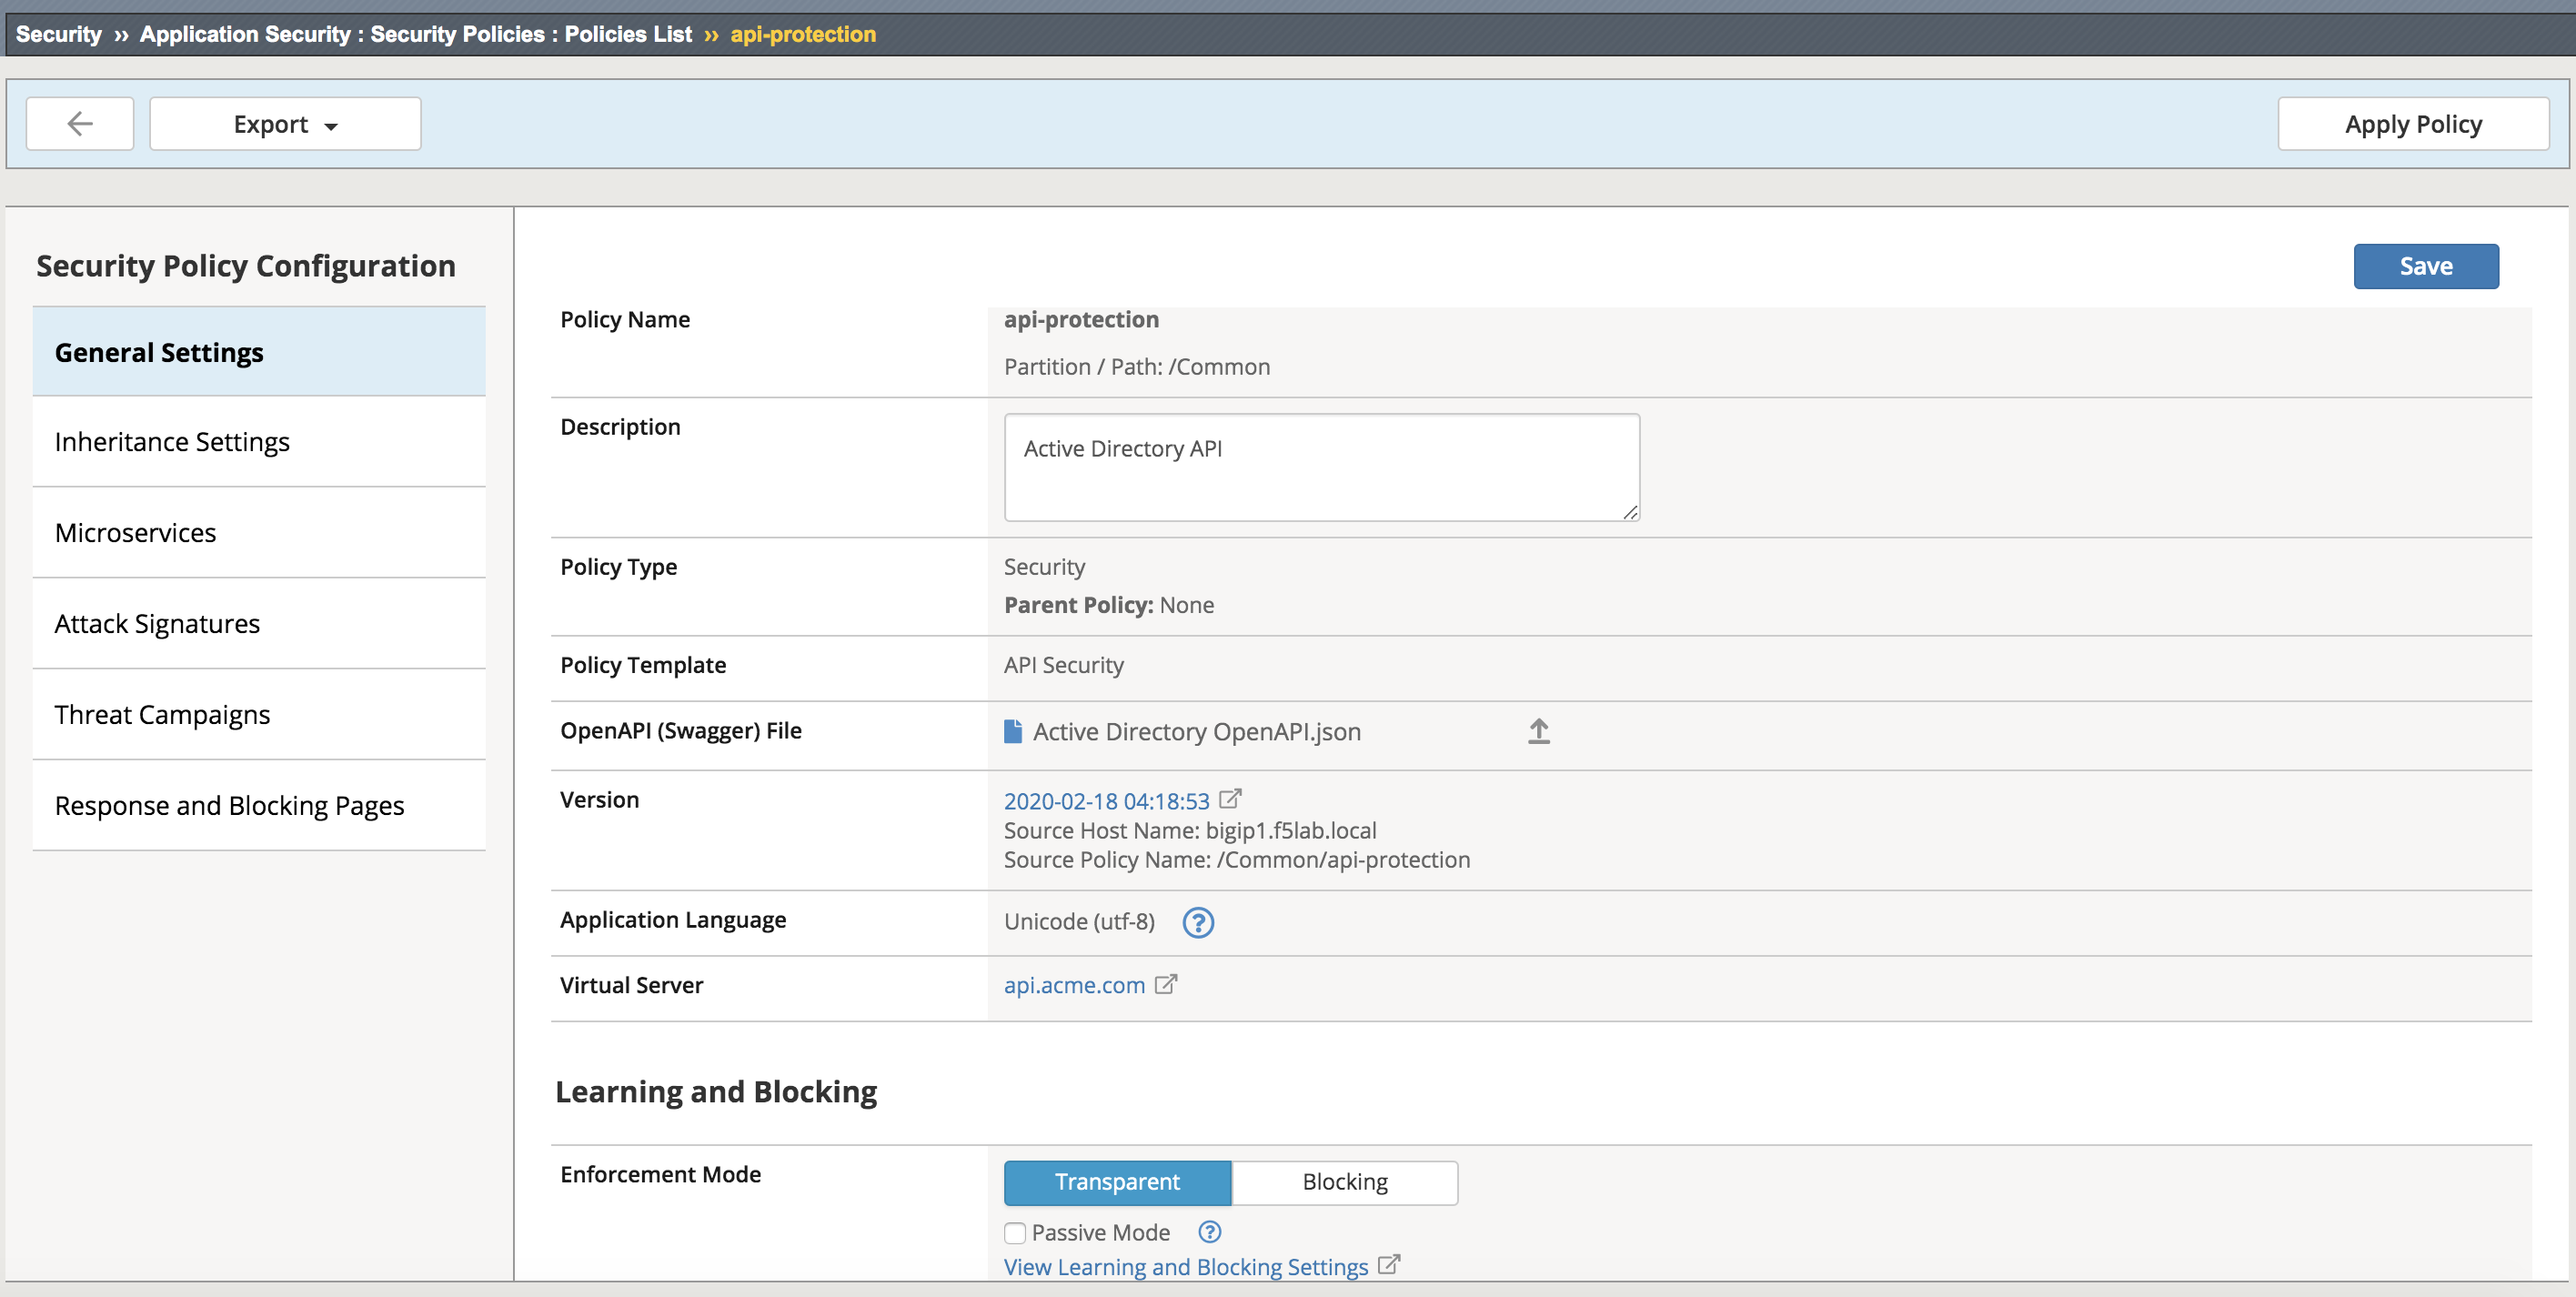
- From the web browser, click on the Security -> Application Security -> Security Policies -> Policies List. Click api-protection. Notice the Enforcement Mode is set to Blocking. Set the Enforcement Mode to Transparent. Be sure to click Save, then Apply Policy.
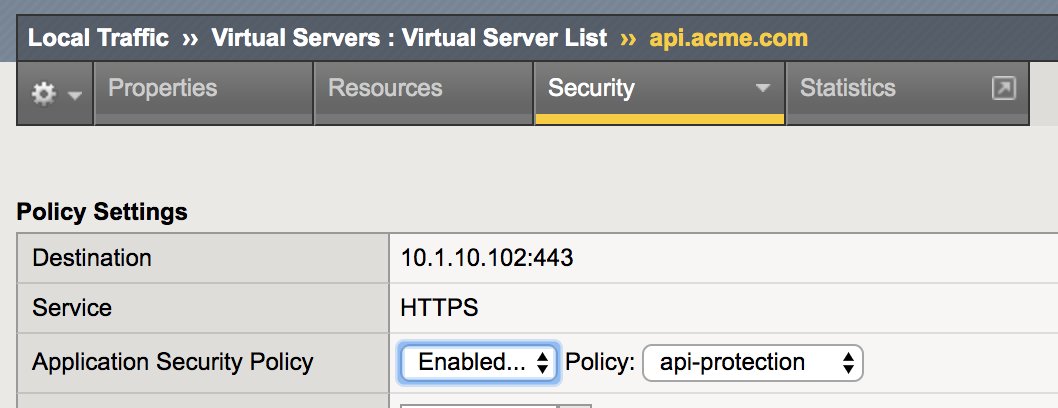
- Apply the waf policy to the api.acme.com virtual by navigating to Local Traffic -> Virtual Servers -> api.acme.com -> Security -> Policies and set the Application Security Policy to enabled and the Policy to api-protection.
- Click Update.